Quick Start
The Blackbeard Quick Start Guide will walk you through how to setup a new Portal with Blackbeard in about 5 minutes.
## Step 1: Activate Blackbeard
You need to explicitly activate Blackbeard to use it. By default, your Portal will have the standard Portal front end enabled.
**This step can only be completed by a TIBCO Mashery employee. Please contact your representative or open a support request to enable Blackbeard on your portal.**
## Step 2: Pick a Theme
We've built 3 starter themes to help you get up-and-running more quickly.
[Download the starter kit](https://github.com/mashery/portal-theme-starter-kit/archive/master.zip) and unzip it. The files for all three themes are in the `dist` folder. Pick the theme you like best.
Download the Starter Kit
*__Note:__ Your existing Portal theme will not work with Blackbeard. The markup structure and JavaScript environment is different. Attempting to use an old theme with Blackbeard will cause errors that will break your Portal.*
 ';
```
*__Psst...__ Don't forget to click save.*
';
```
*__Psst...__ Don't forget to click save.*
Theme Demos
View demos of all three themes using the links below. ## Step 3: Add Your Theme Once you've picked a theme, you need to do some quick setup. **Upload Your Theme Files** 0. In the API Control Center, go to `Manage > Content`, and click on the `File Manager` button. 0. Upload the CSS file in the `css` folder for your theme. 0. Upload the `main.js` file in the `js` folder for your theme. **Configure Your Theme** 0. In the API Control Center, go to `Manage > Portal` and click on `Portal Setup`. 0. Under the `Custom JavaScript File Inclusion` section in the `Body JavaScript File URL` field, put `/files/main.js`. 0. Under the `Custom CSS Files` section in the `Screen Stylesheet URL` field, put `/files/{your-theme}.css` (replacing `{your-theme}` with the name of the CSS file for your theme). 0. Under the `Inline Javascript` section in the `Body JavaScript` field, copy/paste the contents of the `setup/body.js` file that came with your theme. 0. Scroll to the bottom of the page and click `Save`. ## Step 4: Add Some Content The *Portal Theme Starter Kit* comes with some starter layouts that you can modify as needed. 0. Open the `layouts` directory in your chosen theme. 0. In the API Control Center, go to `Manage > Content`. 0. Uncheck the `Use TinyMCE` checkbox. 0. Under `Custom Pages`, click on the first item (the one in bold) and copy/paste the contents of either `homepage.md` or `homepage-with-video.md` into the content area. Then click `Save`. 0. Under `Documentation`, click on the first item (the one in bold) and copy/paste the contents of either `documentation.md` or `documentation-better-docs.md` into the content area. Then click `Save`. 0. Under `Blog`, click on the first item (the one in bold) and copy/paste the contents of `blog.md`. Then click `Save`. ## Step 5: Customize Now that you've got your new Portal set up, you're ready to customize it for your brand.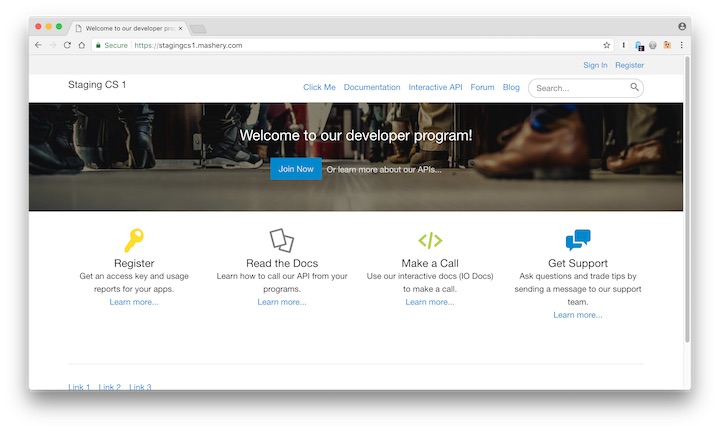 Default
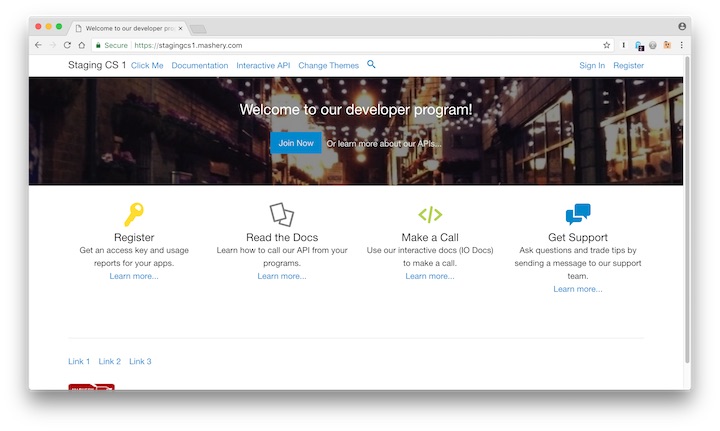 Skinny Nav
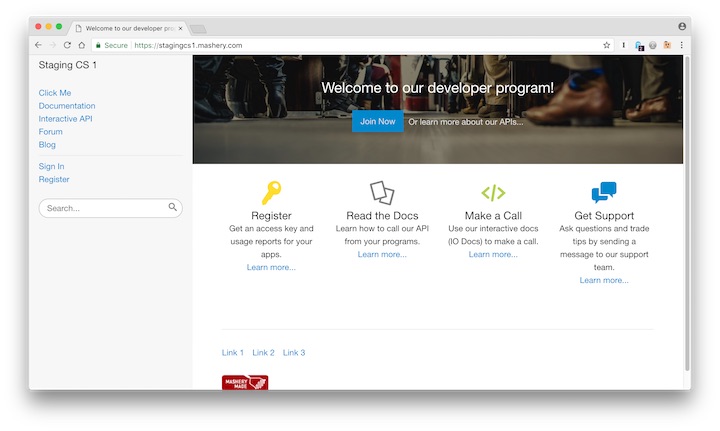 Sidebar
Adding a Logo
The first thing most people want to do is add a logo. In the API Control Center, go to `Manage > Portal` and click on `Portal Setup`. Copy/paste this code into the `Body JavaScript` field under the `Inline Javascript` section. Replace `{logo-url}` with the name of your logo file. **What's the URL for your image?** Upload it to the `File Manager` under `Manage > Content`, then click on the image to get a URL you can copy/paste. ```js window.portalOptions.logo = 'Customize Colors
Using a text editor like [VS Code](https://code.visualstudio.com) (free and cross-platform), you can do a find-and-replace for the colors below and replace them with your brand's colors: - #0088cc / #08c - #ffdd2f - #b4d253 - #a42032 - #272727 - #ffffff / #fff **Prefer to work with Sass?** You can access the complete source files for your theme in the `src` directory.Docs Navigation
- API Documentation Portal
- IO Docs Definition
- Mashery API Documentation
- Mashery 3.0 API Guide
- Mashery 2.0 API Guide
- OAuth Supporting Methods
- Examples
- JSON RPC
- Authentication
- API Objects
- Fetching Objects
- Query Language
- Creating Objects
- Updating Objects
- Validating Fields
- Deleting Objects
- Applications
- General Object Methods
- Members
- Packages
- Plans
- Package Keys
- Keys
- Developer Classes
- Services
- Roles
- Mashery 2.0 Reporting API Guide
- Event Trigger API
- Differences between Roles and Portal Access Groups
- Managing a Portal Access Group Using Mashery V2 or V3 API
- Mashery Reporting Event Post API Guide
- Tips and Tricks
- Your Portal
- API Traffic Manager
- I/O Docs WSDL requirements